


Despite its sophisticated taste, this Roasted Red Pepper Bisque is surprisingly simple to prepare. With just a few basic ingredients and straightforward steps, you'll have a gourmet-worthy bisque ready to enjoy in no time.
Jump to:
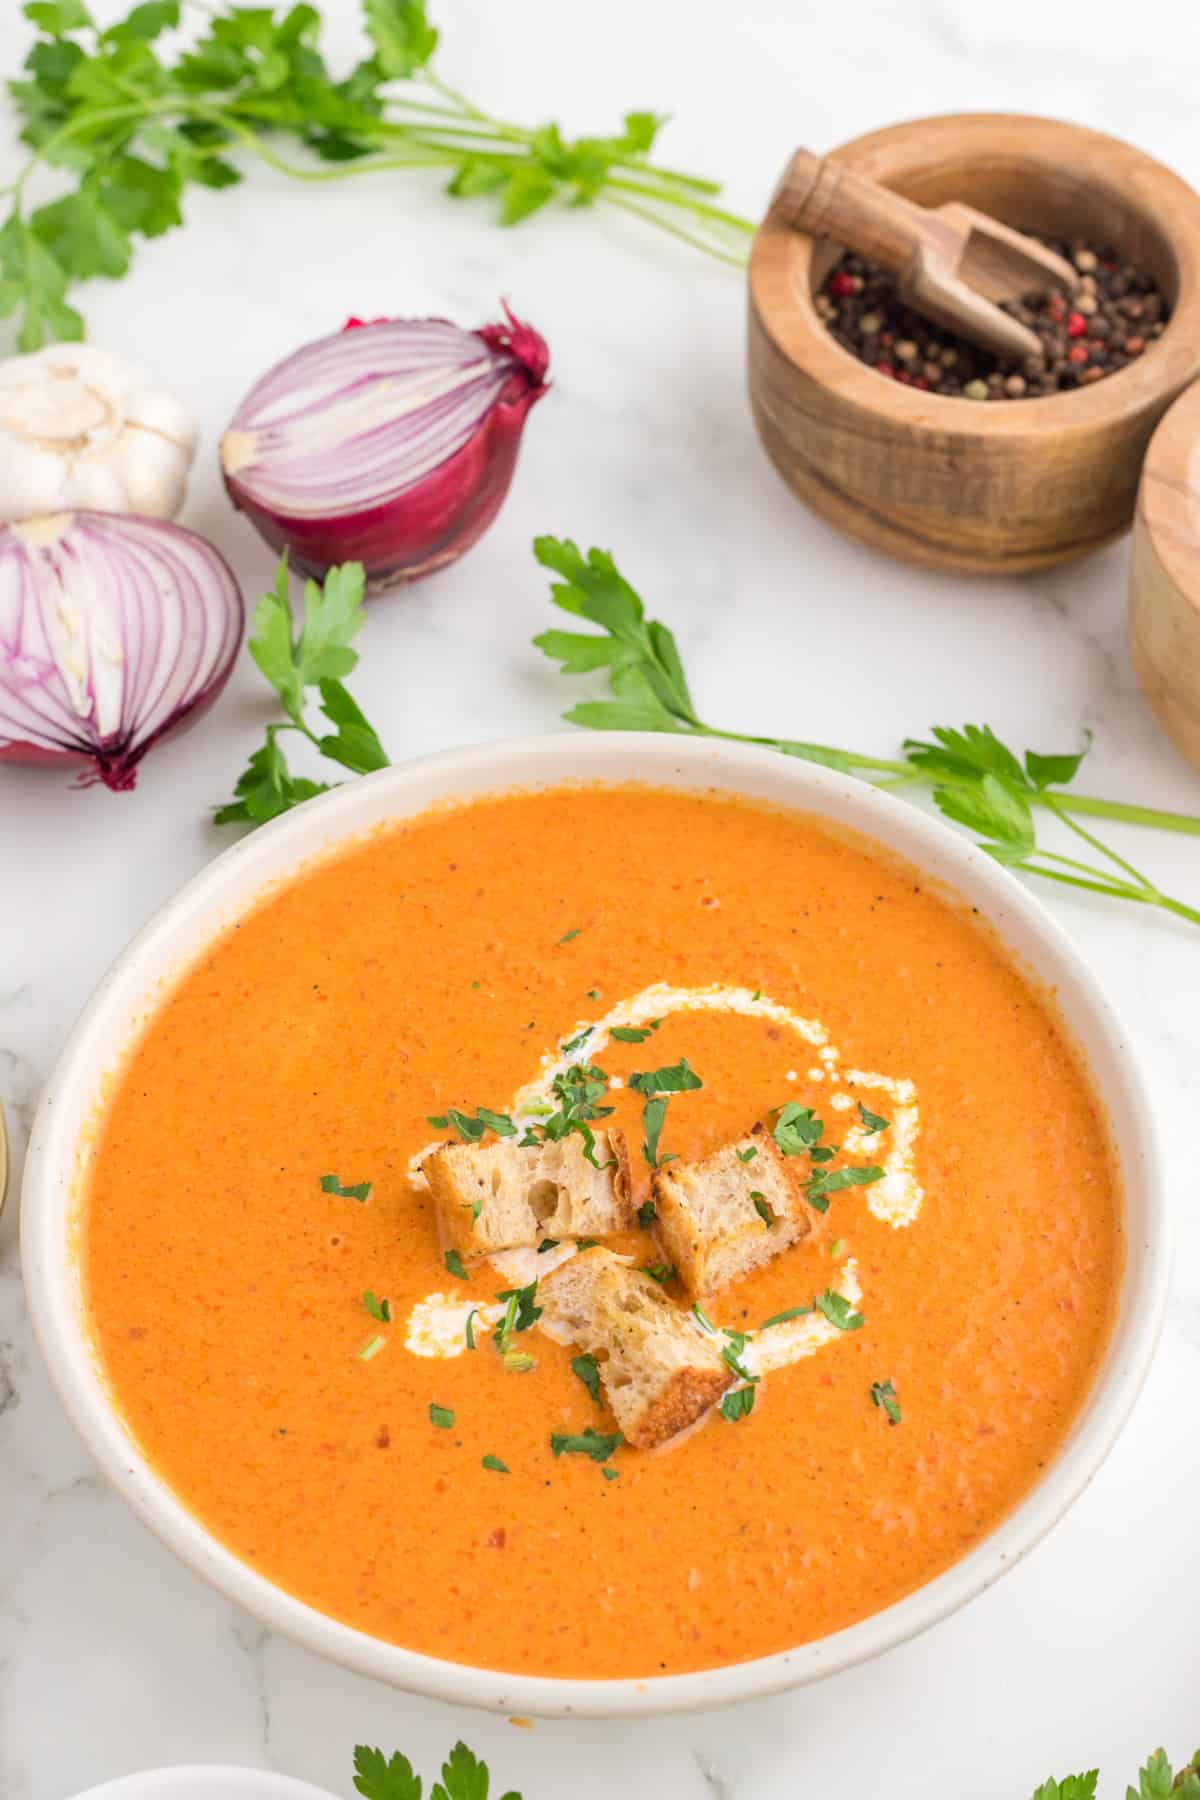
While this creamy soup is utterly delightful on its own, it's also a fantastic canvas for customization. You can experiment with different garnishes like croutons, and shredded cheese, to add your personal touch.
Whether it's a casual weeknight dinner, a festive gathering with friends, or a romantic date night, this red pepper soup is versatile enough to fit any occasion with its charm and elegance, and it's the perfect comfort food for chilly days.
If you love creamy delicious soup try this Squash And Pears Soup.
The ingredients
You will need these simple ingredients you can easily find at the grocery store to make this roasted red pepper bisque.
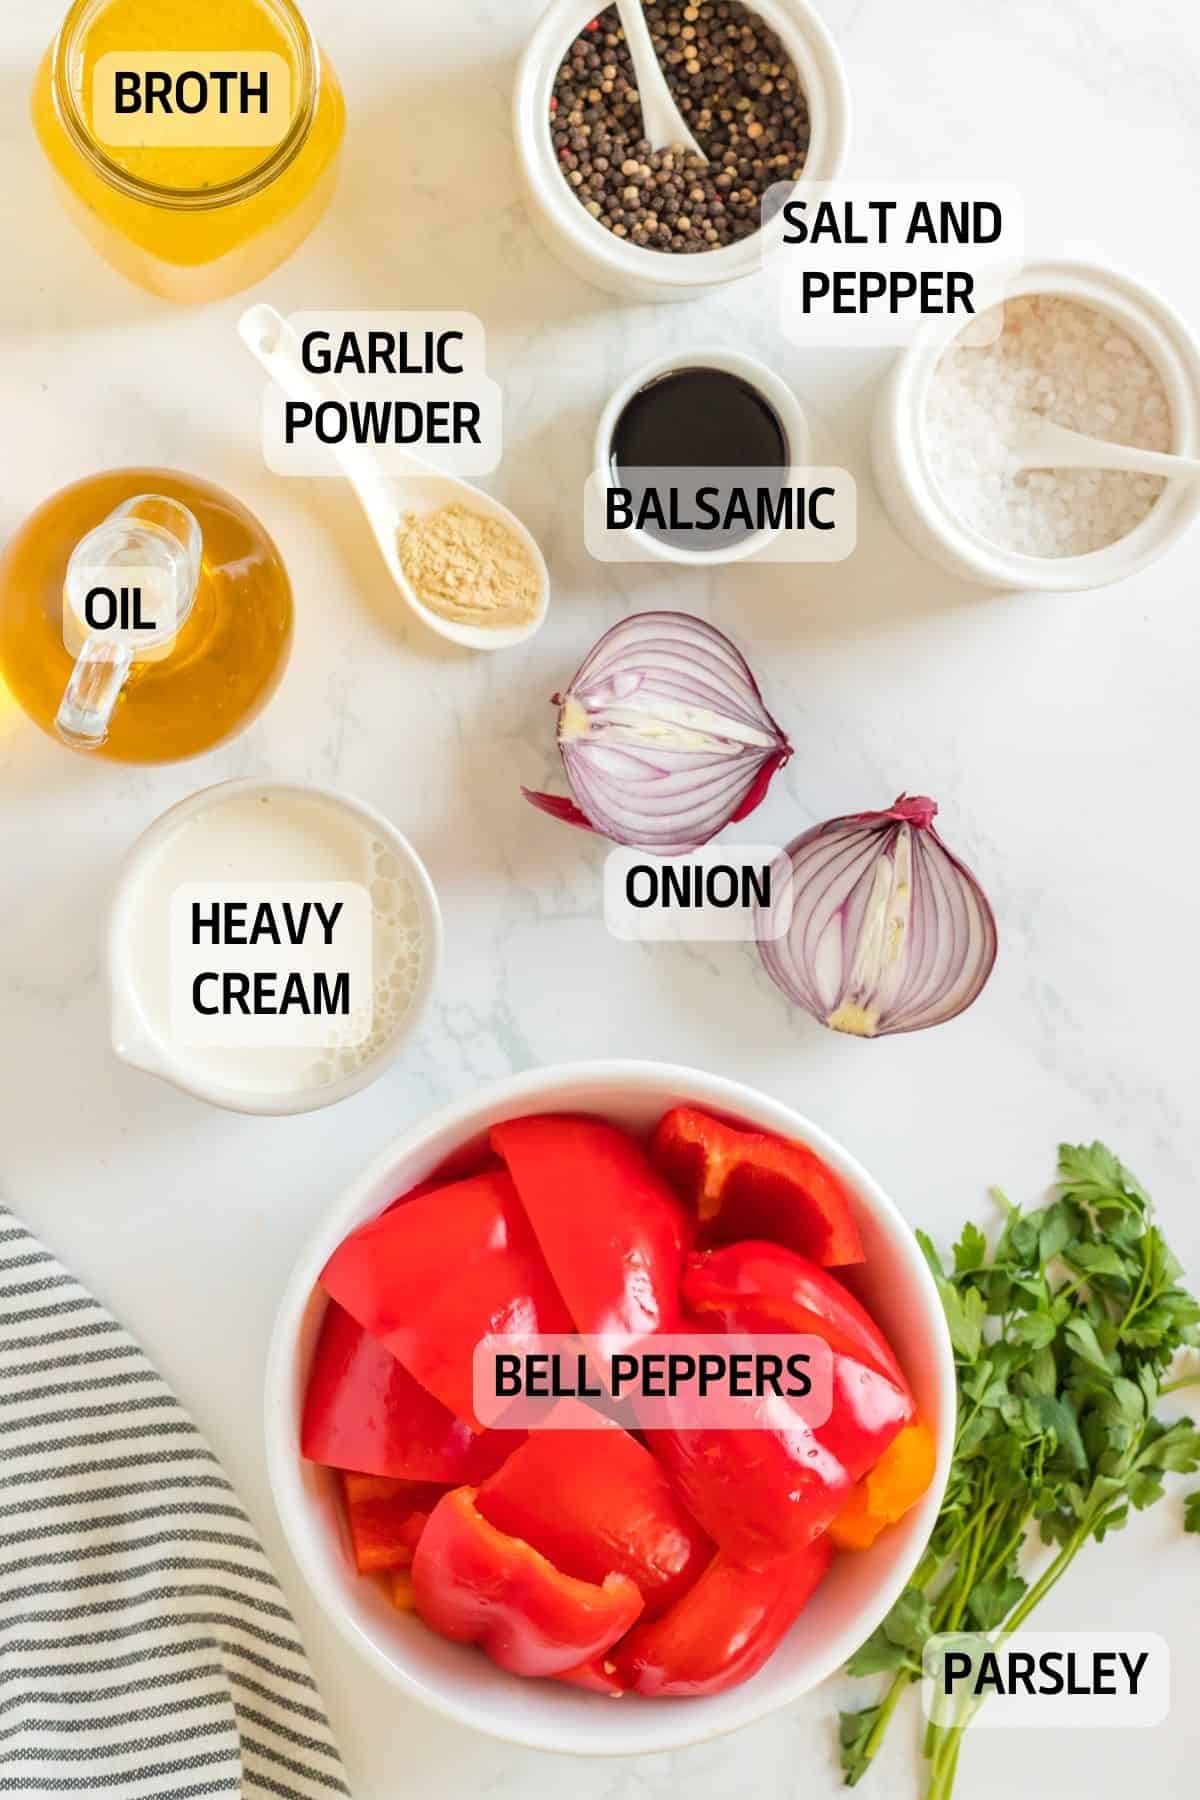
- red bell peppers
- garlic powder or 2 garlic cloves
- olive oil
- onion, diced
- balsamic vinegar
- chicken broth or vegetable stock
- heavy cream
- Sea Salt and black pepper to taste
- Fresh basil or parsley for garnish
See recipe card for quantities
How to make the Roasted Red Pepper Bisque; Step by Step
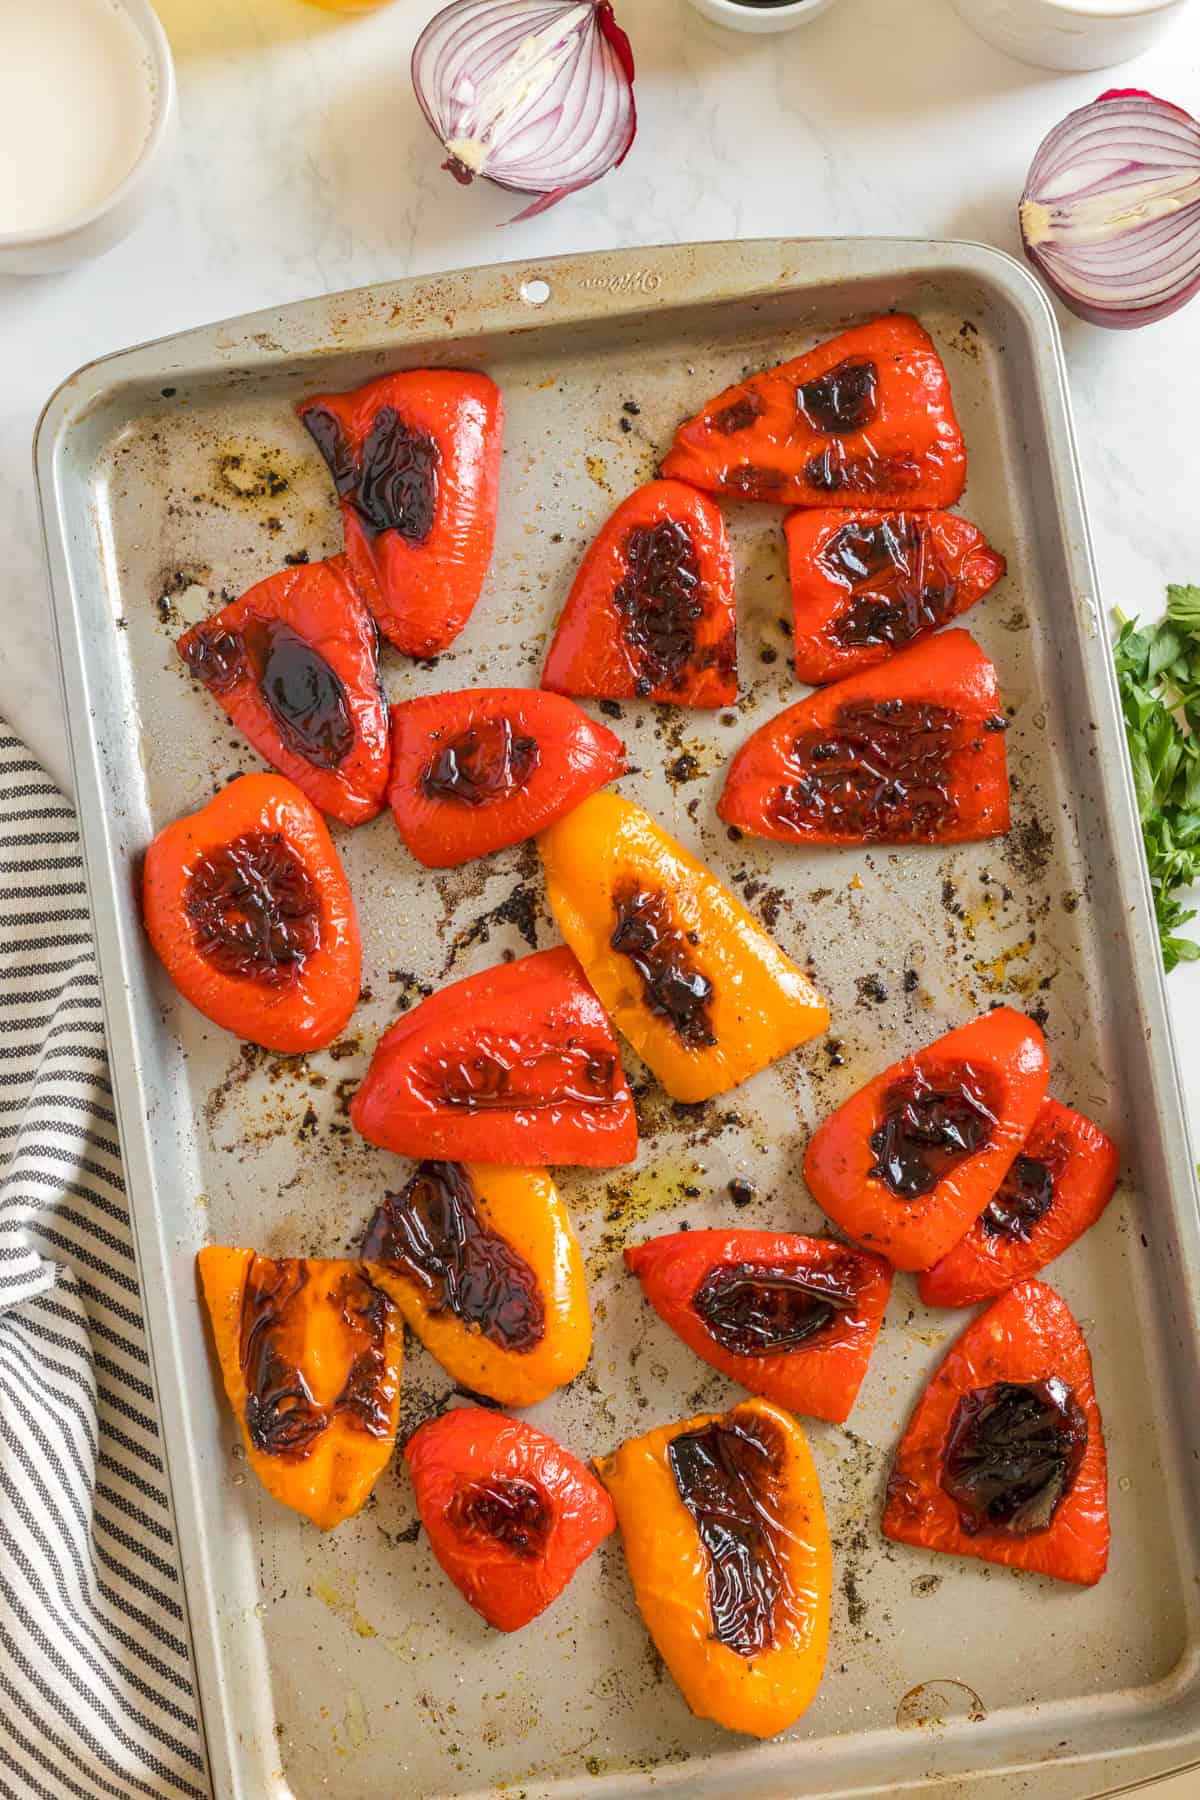
Start by preheating your oven to 450°F .
Cut the pepper in four and remove the seed, place the pepper on a large baking sheet lined with parchment paper, and lightly coat them with olive oil and garlic powder. Roast them in the oven for about 20-25 minutes, or until the skin starts to blister and blacken. Once done, transfer the peppers to a bowl, cover it with plastic wrap, and let them steam for about 10 minutes. This will make peeling them a breeze!
After the steaming process, remove the skins from the roasted red bell peppers. Dice them into small pieces and set them aside.
In a large pot, heat the olive oil over medium heat. Add the diced onions and minced garlic, and sauté onion until they become translucent and fragrant.
Pour the balsamic vinegar and roasted red bell peppers into the pot. Season with salt, and pepper, and give everything a gentle stir.
Pour in the chicken broth, and bring the mixture to a boil. Once boiling, reduce the heat to a gentle simmer, cover the pot, and let it cook for about 15-20 minutes
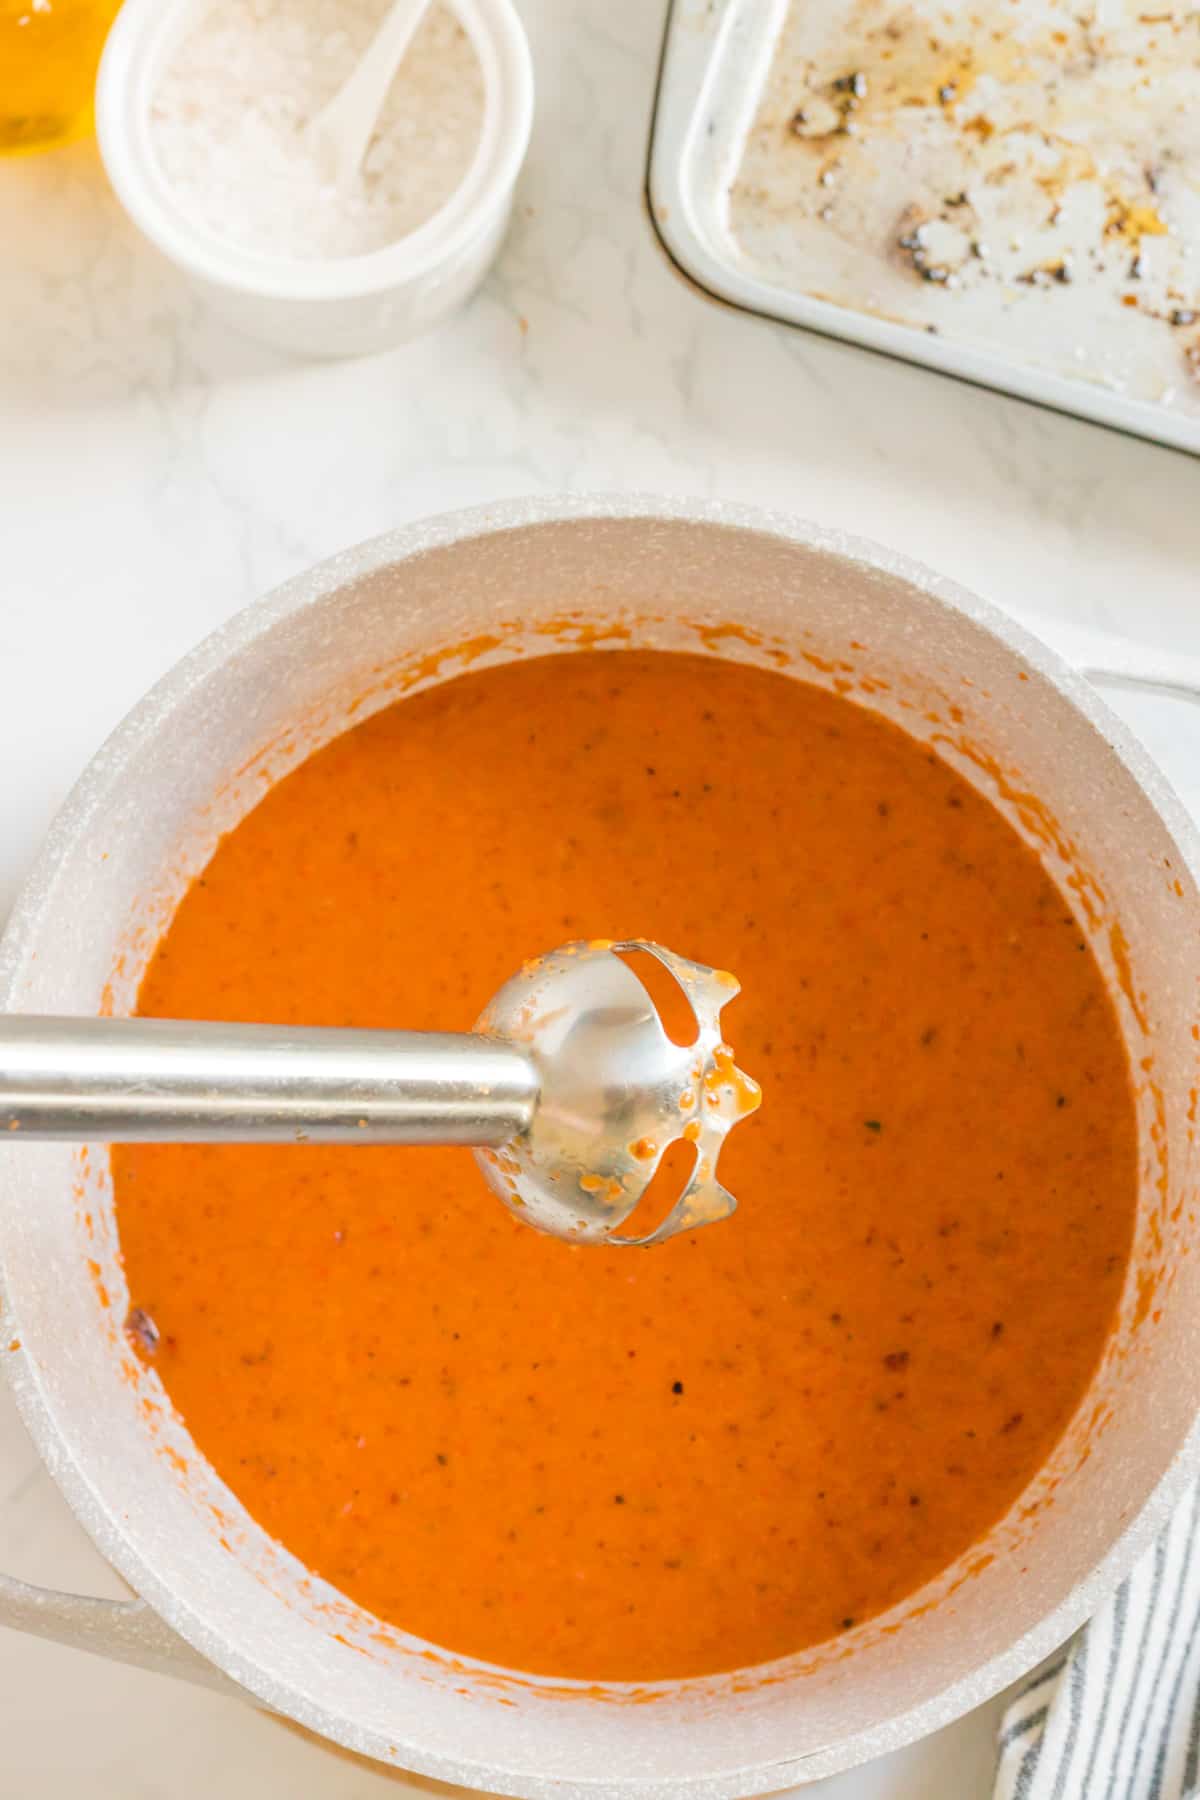
Use an immersion blender (or transfer the mixture to a blender) and carefully blend everything until smooth and creamy.
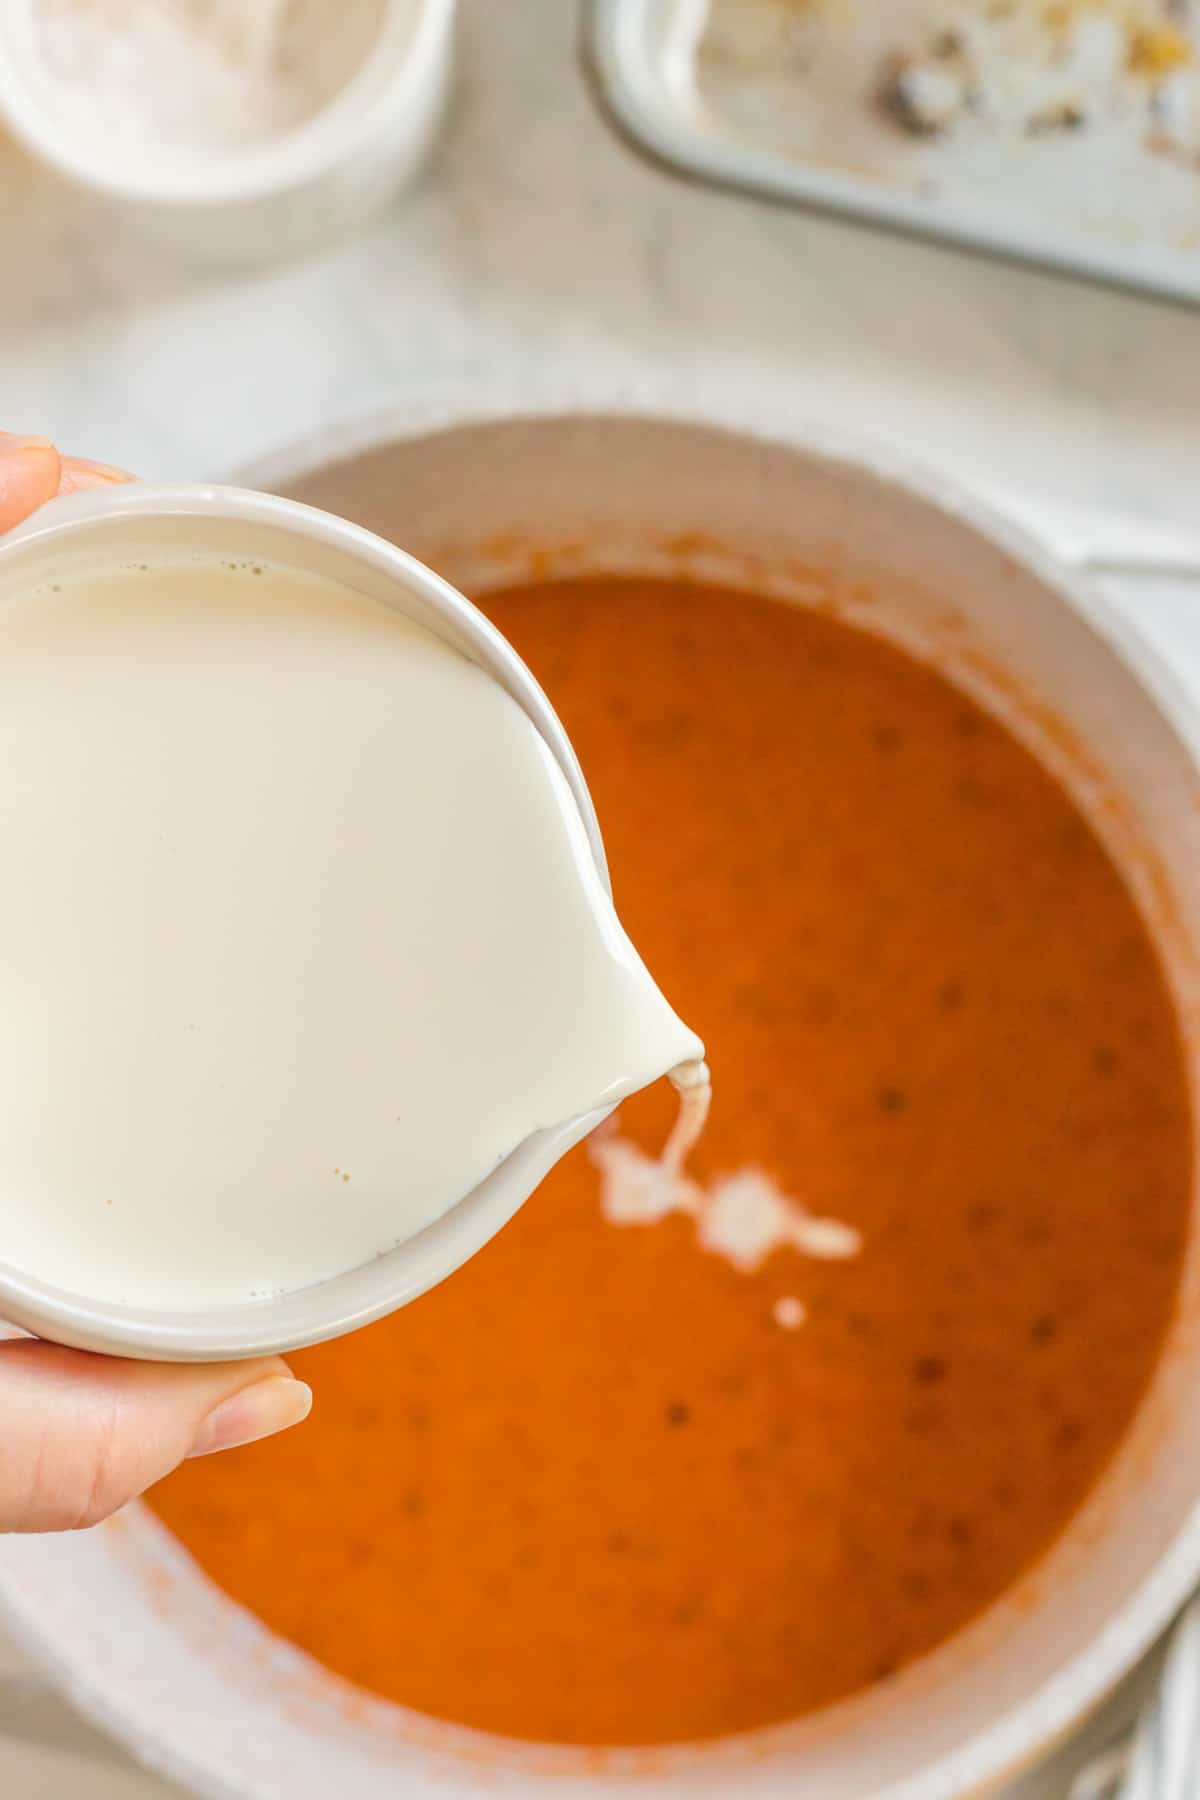
Stir in the heavy cream, and let the bisque simmer for another 5 minutes to allow all the flavors to meld together beautifully.
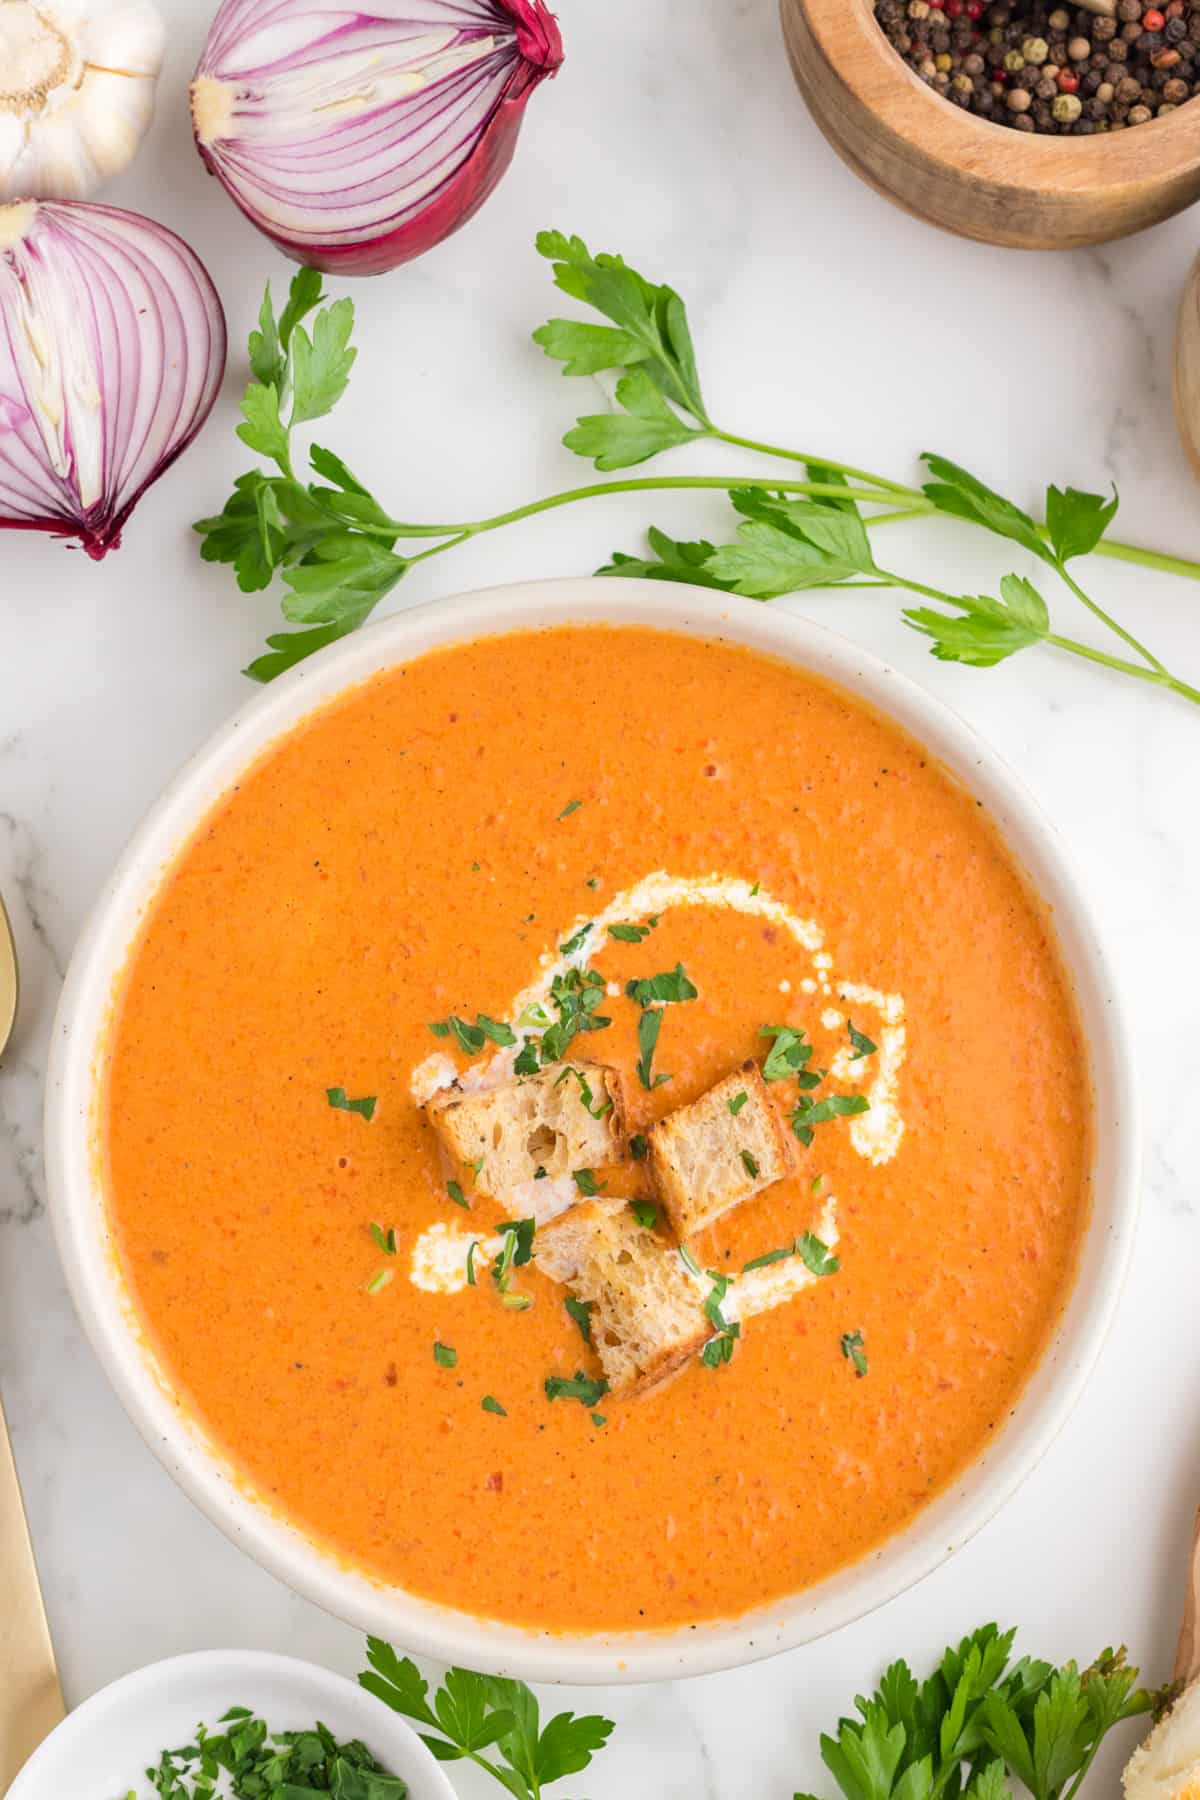
Ladle the luscious bisque into bowls. You can even drizzle a bit of extra cream on top for a touch of elegance.
Tips
Here are some helpful tips to make your Creamy Roasted Red Peppers Bisque even more delightful:
Roasting the Red Bell Peppers: For the best flavor, make sure to roast the red bell peppers until the skin is nicely blistered and blackened. This process brings out their natural sweetness and imparts a smoky aroma to the bisque. Don't rush it; the extra roasting time is worth it!
Removing the Pepper Skin: When peeling the roasted red bell peppers, you can do it easily by gently pulling off the skin with your hands. If any stubborn bits remain, use a knife to scrape them away. This step ensures a smooth bisque without any unwanted texture.
Consistency Control: If you prefer a thicker bisque, let it simmer a bit longer to reduce the liquid. Conversely, if you desire a thinner consistency, you can add a bit more vegetable broth or water until it reaches your desired thickness.
Creamy Dreams: While heavy cream creates the ultimate creamy indulgence, you can also use alternatives like coconut milk or a blend of half-and-half for a lighter version. These substitutions still offer a luxurious texture and bring their unique flavors to the dish.
Pairing Perfection: Serve the bisque with a side of crusty bread or homemade croutons for some added crunch. The contrast between the creamy bisque and the crispy bread is a match made in culinary heaven!
Make It Ahead: You can prepare the bisque in advance and store it in the refrigerator. Reheat it gently on the stovetop over low heat before serving, and it will taste just as delicious as when it was freshly made.
Variations
Spice It Up: If you love spicy food, consider adding a diced jalapeño or a pinch of crushed red pepper flakes during the sautéing step. The hint of spiciness will give your bisque a delightful kick.
Cheesy Twist: For a luscious cheesy flavor, stir in some grated Parmesan or Pecorino Romano cheese into the bisque just before serving. The melted cheese will take the creaminess to a whole new level.
Roasted Tomato Addition: Enhance the flavor complexity by adding a few roasted tomatoes to the bisque. Roasted tomatoes pair wonderfully with roasted red bell peppers, adding a rich and tangy dimension to the bisque.

Serving
Crunchy Croutons: Serve the roasted red pepper bisque with homemade croutons or store-bought ones on the side. The crispy texture complements the smooth bisque and adds a delightful contrast.
Baguette Slices: Offer some French bread slices or garlic bread to dip into the bisque. The combination of the soft bisque and the crunchy bread is a match made in heaven.
Cheesy Indulgence: For cheese lovers, provide a small bowl of freshly grated Parmesan cheese or grated gouda cheese at the table. Let your guests sprinkle a bit of cheese on top of their bisque for an extra creamy and savory experience.
Soup Shooters: Consider serving the bisque in shot glasses or small cups as an appetizer during parties or gatherings. It's an elegant way to introduce your guests to the wonderful flavors of the bisque without overwhelming them.
Side Salad: Pair the bisque with a refreshing side salad for a complete meal. A simple green salad with vinaigrette dressing or a Mediterranean-inspired salad with olives and feta cheese would be a great choice.
FAQ
Can I use different colored bell peppers for this bisque?
Absolutely! While the recipe calls for red bell peppers, you can certainly experiment with different colored peppers like yellow or orange to create a colorful variation. Each color will bring its unique flavor profile to the bisque.
Can I make the bisque ahead of time for a dinner party?
Definitely! The bisque can be prepared in advance and stored in the refrigerator for up to 3-4 days. Reheat it gently on the stovetop before serving to maintain its creamy texture.
Yes, you can freeze the bisque for up to 2-3 months. Make sure to store it in airtight containers or freezer bags to prevent freezer burn.
While traditionally served hot, this bisque can also be enjoyed chilled during the summer months. Simply refrigerate it until cold and serve in chilled bowls.


Roasted Red Pepper Bisque
Ingredients
- 4 large red bell peppers
- 2 teaspoons garlic powder or 2 garlic cloves
- 2 tablespoons olive oil
- 1 medium-sized onion diced
- 1 tablespoon balsamic vinegar
- 4 cups chicken broth or vegetable stock
- 1 cup heavy cream
- Sea Salt and black pepper to taste
- Fresh basil or parsley for garnish
Instructions
- Start by preheating your oven to 450°F .
- Cut the pepper in four and remove the seed and place on a large baking sheet lined with parchment paper, and lightly coat them with olive oil and garlic powder. Roast them in the oven for about 20-25 minutes, or until the skin starts to blister and blacken. Once done, transfer the peppers to a bowl, cover it with plastic wrap, and let them steam for about 10 minutes. This will make peeling them a breeze!
- After the steaming process, remove the skins from the roasted red bell peppers. Dice them into small pieces and set them aside.
- In a large pot, heat the olive oil over medium heat. Add the diced onions and minced garlic, and sauté onion until they become translucent and fragrant.
- Pour the balsamic vinegar and roasted red bell peppers into the pot. Season with salt, and pepper, and give everything a gentle stir.
- Pour in the chicken broth, and bring the mixture to a boil. Once boiling, reduce the heat to a gentle simmer, cover the pot, and let it cook for about 15-20 minutes
- Use an immersion blender (or transfer the mixture to a blender) and carefully blend everything until smooth and creamy.
- Stir in the heavy cream, and let the bisque simmer for another 5 minutes to allow all the flavors to meld together beautifully.
- Ladle the luscious bisque into bowls. You can even drizzle a bit of extra cream on top for a touch of elegance.
Notes
Tips
Here are some helpful tips to make your Creamy Roasted Red Peppers Bisque even more delightful:- Roasting the Red Bell Peppers: For the best flavor, make sure to roast the red bell peppers until the skin is nicely blistered and blackened. This process brings out their natural sweetness and imparts a smoky aroma to the bisque. Don't rush it; the extra roasting time is worth it!
- Removing the Pepper Skin: When peeling the roasted red bell peppers, you can do it easily by gently pulling off the skin with your hands. If any stubborn bits remain, use a knife to scrape them away. This step ensures a smooth bisque without any unwanted texture.
- Consistency Control: If you prefer a thicker bisque, let it simmer a bit longer to reduce the liquid. Conversely, if you desire a thinner consistency, you can add a bit more vegetable broth or water until it reaches your desired thickness.
- Creamy Dreams: While heavy cream creates the ultimate creamy indulgence, you can also use alternatives like coconut milk or a blend of half-and-half for a lighter version. These substitutions still offer a luxurious texture and bring their unique flavors to the dish.
- Pairing Perfection: Serve the bisque with a side of crusty bread or homemade croutons for some added crunch. The contrast between the creamy bisque and the crispy bread is a match made in culinary heaven!
- Make It Ahead: You can prepare the bisque in advance and store it in the refrigerator. Reheat it gently on the stovetop over low heat before serving, and it will taste just as delicious as when it was freshly made.


Sarah
Thanks !! This soup was amazing !!
Sophie
Thanks Sarah!
Amy Liu Dong
This is so easy and delicious. A perfect soup to make this fall season!
Sophie Viau
I'm glad you found the soup recipe easy and delicious! Fall is a great time for hearty and comforting soups
Jamie
My kind of soup to make in the fall season. It is delicious and so easy to make!
Amy Liu Dong
Such an easy and delicious soup to make. This is perfect for a cold weather season!